You are wondering about how to apply eyeshadow but getting spun among thousands of reading materials on the Internet? Here we are to serve. We make sure as you finish scanning through the end of this paper, your way to have a fancy eyeshadow look will be much easier.
How To Apply Eyeshadow? – Five Easy-To-Follow Steps
#Step 1: Prime Your Eyes
Firstly, you need to know the usefulness of an eyeshadow primer before coming to the what-to-do part of priming your eyes. Well, your eyeshadow will be long-lasting and not slide off the eyelids if you use an eye primer. On top of that, the primer is particularly great if your eyelids tend to be oily or the eyeshadow keeps creasing on your lids.
Now, to apply primer on your eyes, spray a small dollop of eyeshadow primer onto a clean, dry ring finger. Then, gently and slowly rub the primer over your eyelid, around the corner of your eyes, even your brow bone, and your lower lash line.
#Step 2: Build Your Base
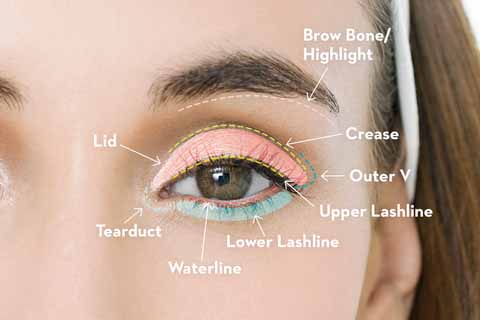
After priming your eyes, you can move to the next step of adding colors to glow up “the window to the soul.” There are commonly four shades that you can easily apply on your favorite eyeshadow looks:
- A neutral shade for the lid
- A medium shade is suitable for the crease.
- Color your outer corner with a dark shadow, and opt for a light shade if you want to highlight your brow bone and inner corner.
Bear in mind that apply a neutral shade as the first layer for your eyeshadow, using a wide brush to sweep the shade across your eyelid evenly. Abide by this prime rule for every makeup look you are going to choose. We recommend you add a color similar to your skin tone since your makeup will look more natural. If you prefer a sparkly style, then go for a lighter gleam in colors. Or go darker if you are obsessed with smoky eyes.
Besides, based on your skin tone to choose the eyeshadow colors, you can hinge on the color of your eyes. For example, brown eyes will look great with grey, purple, gold, and green shades. Meanwhile, orange, yellow, purple, and red colors make blue eyes more alluring. But if you have a couple of green eyes, try enhancing your eyes with different shades of eyeshadow like grey, yellow, red, and purple.
#Step 3: Define Your Crease
Now let’s define your crease. We guarantee that your eyes will look bigger and wider.
To achieve a natural eyeshadow look, have your fluffy crease brush into a medium color shade. Next, close your eyes and start applying the eyeshadow along the conjunction between your eyelid and your brow bone, bringing a wash of delicacy rather than a rigid line on your eyes.
Dip your fluffy brush into the dark shade to define the shape of your eyes and the outer corner of your crease more even further. Doing so will create a V-shape stretching from the upper lash line to the outer crease.
#Step 4: Blend & Define
After you finish defining your crease, you can switch to the blending part. Spread the shades on the crease evenly until they mingle well and seamlessly into your lid. In case you over-blend some of the dark pigment, don’t worry. You need to work with your crease brush again to blend some more shadow.
Once the shadow reaches perfection, you can define your lash line with a pencil eyeliner. You can choose to either cease at the end of the eyelashes or continue drawing a winged eye look. After that, add a medium or dark eyeshadow that matches the color of your eyeliner.
But if you do not like using eyeliner, then dip your brush into whichever eyeshadow color and spread it over the areas of your upper and lower lash line to form an exquisite line.
#Step 5: Highlight Away
You are almost there! In the final step, work with the lightest eyeshadow shade to make your eyes more mesmerizing.
You can apply whichever shade you prefer along the brow bone so that your face will look brighter overall. Creating some fake dots along the inner corners of your eyes will make your eye look bigger and more alert.
Use mascara to finish your look, and you are ready to shine.
Tips to Have Eyeshadow Applied Perfectly
#1. Choosing Your Brushes
Before you start to “dress” your eyeshadow look, selecting a specialized makeup brush is surely a helpful supporter in your girly tasks. Below are four makeup brushes highly recommended by us for beginners, particularly.
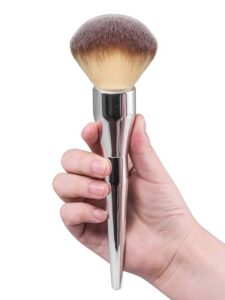
- A big fluffy domed powder makeup brush helps embrace your entire lids with many patterns of color.
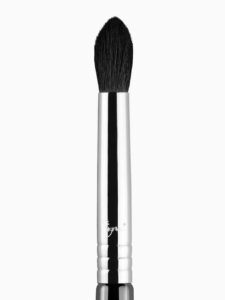
- A small tapered blending brush for sharpening the edges of your crease, and you can keep your blending clean when working with this brush.
- An angled blending brush is an easier tool to pat the inner or outer corners of your eyes.
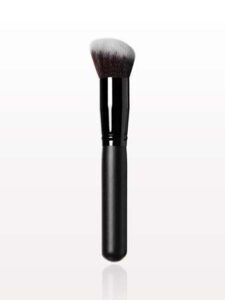
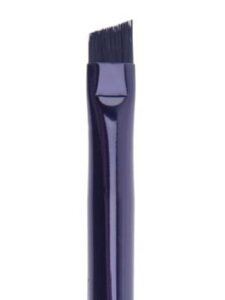
- An eyeliner brush with angled bristles for the precise definition of your lash line.
#2. Applying Eyeshadow for Different Eye Shapes
Applying Eyeshadow on Monolid Eyes
You will notice that those who have monolid eyes do not have any visible hood or crease. A typical method to highlight this eye shape is applying darker shadows from the outset as the first base. Then diffuse the lighter blend upwards.
Applying Eyeshadow on Downturned Eyes
If the direction of your eyes’ outer corners tends to be downward, meaning that you possess downturned eyes, then you need to create darker shadows for the outer edges of your eyes. With this application, your eye look will be more ultra-flattering.
Applying Eyeshadow on Round Eyes
If you have round eyes, we suggest you have both the top and bottom of your eyes lined carefully and evenly. Remember to pull the liner between the inner and outer corners of your eyes upwards, creating an effect called a triangle that points out on the lid.
Applying Eyeshadow on Almond Eyes
We advise paying attention to darker eyeshadow on the outer edges of your eyes and mingling it towards the hairline. Also, diffuse lighter shade colors as a method of creating gradient effects near the inner corners of the eyes.
Applying Eyeshadow on Hooded Eyes
Because hooded eyes have characteristics of the deeper crease from view when you open your eyes, to bring that crease out, we recommend darker eyeshadows, especially on the top of your eyes’ folded areas.
Applying Eyeshadow on Upturned Eyes
Your eye look will be more natural with the cat-like effect. You need to draw a line between the top and bottom of your eyes. But do the half with the outer corners. Then, apply the eyeshadow shades outwards and towards your hairline.
Final Verdict
We hope that our paper about how to apply eyeshadow is useful for you to follow and achieve the desired result. You can take a picture of yours and share your final work with everyone in the box below.
And lastly, we thank you for reading till the end of our post.


